Luckily I had stuff leftover from middle school that I could use.
I had an old Vex starter kit that had been bought for robotics summer camp.

I also had an old Boe-Bot Kit that was also bought for another year of robotics summer camp.


The plan was to have two 3-wire Vex motors to power the claw. One would be power the first segment, the other would power the second. The first one would be geared so that it would better handle the weight of the claw, the second would be attached directly. I did not do the last segment because it was too small to warrant a motor. Foam board was the main material for the claw because it had well enough strength for its weight. The patterns for the claw shapes were the free ones from Tatsutetsu. Thanks man!
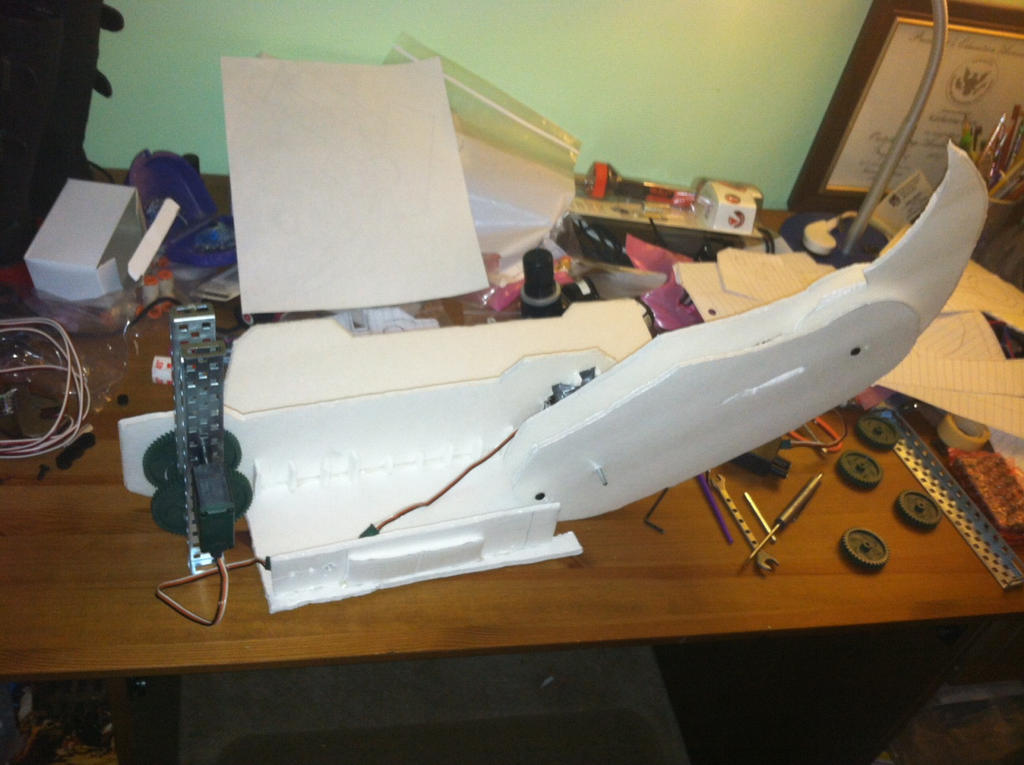
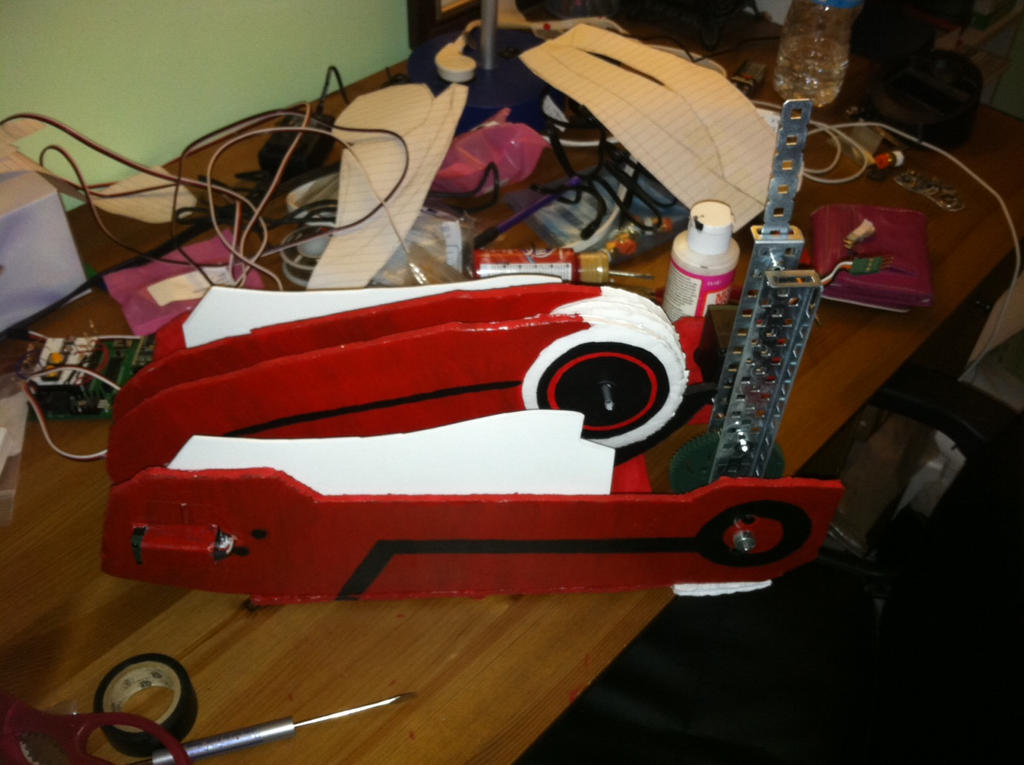
At first I tried keeping the last talon like part solid, but it won't fold so I decided to keep it free hanging so that I could fold it. The Vex motors were attached via nuts, hex screws and hot glue. The first Vex motor was also geared toward torque using Vex gears with a ratio of 36:60 or 1.6. The Vex motor ended up not being able to hold the weight at that setup and sagged so the ratio was changed to 12:60 or 5. At this setup it did not sag anymore but having the Vex 3-wire motor move under this setup caused it to click and stagger. This is not good behavior for a motor or a servo so it was removed and replaced with a stronger Vex 2-wire motor as I did not have any smaller count toothed gear or any bigger count toothed gear. It worked like a charm nonetheless! The second servo was able to lift its load well so it was not touched at all. The claw was then painted.
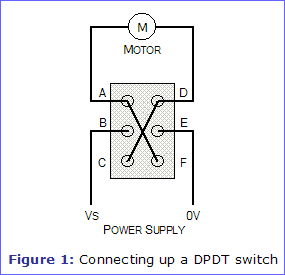
The controls for the set was the Parallax micro controller and a 7.2V source. The 3 wire Vex motor had to be controlled from the micro controller and the 2 wire Vex motor was be controlled by a 7.2V source and a Double Pole Double Throw switch. The schematic for the 2-wire Vex motor control is shown below.
The three wire motor was controlled from a the Parallax Board of Education micro controller. This micro controller also has a its own breadboard attached. I decided to use push buttons as it would be the easiest way for me control the 3 wire motor. The setup on the board is below:

The Board of Education micro controller is programmed in there own version of Basic: Basic Stamp. The code is below.
' {$STAMP BS2}
' {$PBASIC 2.5}
Main:
DO
IF (IN3 = 1) THEN
PULSOUT 13, 450 'counter cwise
PAUSE 50
ENDIF
IF (IN4 = 1) THEN 'clockwise
PULSOUT 13, 1010
PAUSE 50
ENDIF
IF (IN9 = 1) THEN 'counter cwise
PULSOUT 12, 500 '500 previous value
PAUSE 50
ENDI
IF (IN10 = 1) THEN 'clockwise
PULSOUT 12, 1010 '1010 previous value
PAUSE 50
ENDIF
LOOP
So to move forward, you press one push button. To go in reverse, you push the other.
After running the motors through their movements, they work well but do not have the solid strength and reliability of the pneumatics. If there are going to be troubles, then it will be with the claw.
part3
No comments:
Post a Comment