I went out and bought parts.and materials. List is below:
-Compressor (Viair 90C Air Compressor)
-Gauge (Nogren Item: 18-013-212)
-Teflon Tape(Buckeye Hydro)
-Solenoid(SMC SY3240-5LOZ valve, dbl sol, base mt (dc))
-Pneumatic Cylinder(Bimba 316D )
-Pneumatic Cylinder(Bimba 1710D)
-Rod Clevis(Bimba D2313)
-Rod Clevis(Bimba D2311)
-Storage Tank(Reservoir Cartridge 1/4" NPT Item: RC2.5X10-N02)
-Pneumatic fitting Union Tee(SMC KQ2T0700)
-Pneumatic fitting Male Connector(SMC KQ2H0734S)
-Pneumatic fitting Male Connector(SMC KQ2H0735S)
-Pneumatic Plate(SMC SY3000271T)
-Hollow Hex Plug(Parker 219P-4)
-Pneumatic Regulator(Nogren R07-200-RGKA )
-Plug Valve(Parker PV608-2)
-Hex Nipple(Parker 216P-2)
-Hex Union Tee(Parker 2203P-2)
-Pneumatic Tubing(TIUB07BU-33)
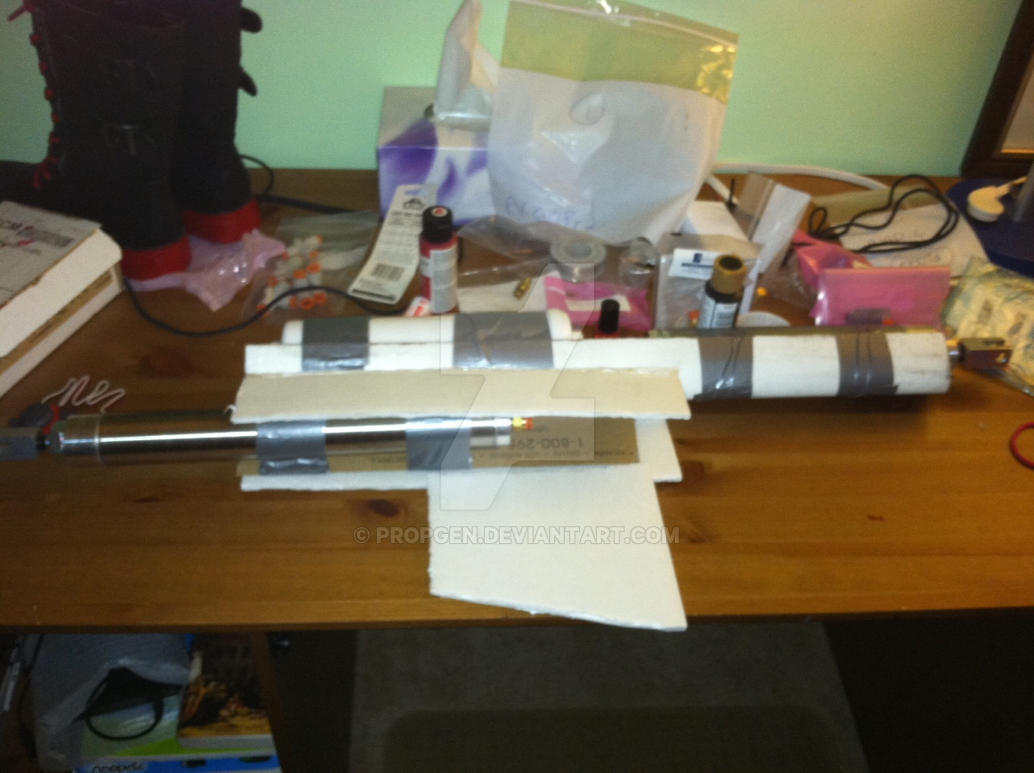
Since pneumatics can end up pretty heavy, I decided to use the lightest and strongest materials I could find and craft easily. I did not have access to shop tools so that left out plastics, metals, and some woods. So I took the next best thing, foam board and cardboard. I chose strong cardboard for the chassis for the gun and foam board as the covering. Sketches of the placement of parts and systems can be seen below.
I protruded one of the cylinders out because I needed a handle to hold Crescent Rose.
I found some strong curved cardboard in a dump that perfect served my needs for the frame for the pneumatics. I needed a hand saw to cut it. I then duct taped the pneumatic storage tank and one cylinder to the top curved cardboard piece and duct taped the second cylinder to the smaller curved cardboard piece. I then hot glued the two pieces together and further reinforced them with foam board while starting to build the frame.
Next I added the pneumatic components and put tubing in according to the sketches. The main components were the air exhaust valve, regulator, gauge, and solenoid. I also built the end piece of Crescent Rose out of foam board, craft foam and hot glue before painting that piece.
To control the pneumatic system, the solenoid has two buttons on it that you can press for manual release. You can also wire up the solenoid to a micro controller if you want the solenoid to be controlled from something like a controller. But since it is controlled through hands, a manual release was sufficient.
After that, I tested the system to see that it worked and had no leaks. It did not. I then proceeded to build the general shape of the gun more, cover the pneumatics and painted it before releasing a video:
It worked well and I was optimistic.


No comments:
Post a Comment