Thursday, March 24, 2016

Crescent Rose QOL changes #1

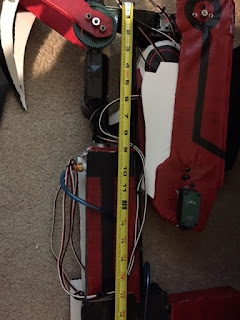
Crescent Rose did a number on my arms when I carried it around during Otakon. Here I attached some duct tape shoulder straps so I can distribute some the weight on my shoulders. My arms will appreciate this.


The strap was made out of duct tape and another drawer slider was attached to prevent the head from bending down too much.


Lastly, there is a servo motor attached to the top of claw to move the hinge back an forth. This piece below.


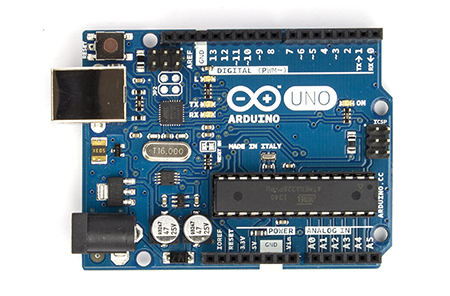
This part currently does not operate and was put in early as a future feature if I ever get that far. Considering I have, it was time to work on it. Since this is a servo motor, I can't just feed it voltage to make it move, these motors require square wave pulses of electricity to move. To produce this wave, I will use a microcontroller. Yes, you can control servo motors just with circuit components but it's easier and more compact to do it with a microcontroller. I will be scrapping the old parallax board and be using the more modern Arduino Uno.

Image from: https://www.arduino.cc/en/uploads/Main/ArduinoUno_R3_Front_450px.jpg

The plan is to have the servo move one way when one button is pressed and the other way when the other button is pressed.


The code and servo schematic connection to the arduino are below. My port connections are different than the diagram below. The resistors I used are 10kohms and the ports are different (I used digital port 7 and 4 for the switches. The servo used digital port 2).

Image from: https://blogger.googleusercontent.com/img/b/R29vZ2xl/AVvXsEiqKkOZjplZDgtLt75HjOAtNiQNs0TAhuWnTqx2h_XHgRsriBM2h2clMzZyJihL78eBa-QB36pBgKH6qkVHiNhh-XVN1WHflDJlwXakvxVEzBVAN9gdh0rE8bL3XWaeLXPESBTAL3rNCDw/s1600/Control+servo+with+push+button+switch+breadboard+view.jpg

Code:

#include <Servo.h>

Servo claw;
int state1=0;
int state2=0;
int pin1=7;//digital port 7
int pin2=4;// digital port 4

void setup() {
  // put your setup code here, to run once:
  claw.attach(2); // digital port 2.
  pinMode(pin1,INPUT);
  pinMode(pin2,INPUT);
}

void loop() {
  // put your main code here, to run repeatedly:
  state1=digitalRead(pin1);
  state2=digitalRead(pin2);
 
  if(state1==HIGH){
    claw.write(180);
  }
  if(state2==HIGH){
    claw.write(0);
  }
  else{
    claw.write(90);// vex servo stop
  }

}


Attachment to Crescent Rose.


Wednesday, March 23, 2016

Crescent Rose Fix #2 Pneumatic System Fixes


One of the major problems that Crescent Rose has is that charging air into its pneumatic system requires an electrical outlet port which isn't found very often in conventions. This wouldn't be much of a problem itself if Crescent Rose could also hold the air that it was charged with for a long time. Sadly it can't hold the air it is charged with for very long and so Crescent Rose wasn't able to move as often as I would have liked at Otakon 2015.

There were two potential solutions that I came up with on the spot.
  1. Use a small hand pump.
  2. Power the pneumatic system using CO2 instead of HPA (High Pressurized Air).

Considering that Crescent Rose requires about 60 psi to go through one piston extension and retraction, a small hand pump might just be good enough to fill the pneumatic system on Crescent Rose without an electrical outlet. Depending how long it takes to fill the system, this might be the best option in terms of portability, speed of refill, and money. I will have to buy a small air pump and run some tests to see if this is the best option.

The other option is to feed CO2 through the system with CO2 cartridges. These things:


Image from: http://images.esellerpro.com/2269/I/732/3/scaleASGCo2.jpg

How it works is that in order to release the air, you have to pierce the top in order to get the gas to expel. There are many industrial uses for these cartridges from food uses to biking to bb and paint guns.  The plan was to buy some of these cartridges and buy a CO2 bike inflator to fill up Crescent Rose just like how Myrtenaster uses an inflator to shoot dust.

However, CO2 is really, really cold as a gas. Depending on the amount of pressure in the system, you can get temperatures as low as -40 degrees Celsius. The solenoid that I am using can not handle gasses that low of a temperature. With the solenoid priced at about $60 each, it's something I didn't want to risk.

But not all was lost, I found out that you can get the same cartridges in N2, nitrogen gas. HPA is actually made up of mostly N2 and this gas should be a perfect replacement for the CO2 if all goes well. It's harder to find and a bit more expensive but depending on the speed of refill this might be it. I will have to run some tests with this too.

My shopping list:
  •  1.8gram N2 cartridges from Leland gas technologies (P/N: 42222N21700)
  • Nashbar Mini Pump from Nashbar (P/N: BN-MINP) 
  •  Schrader valve: Campbell Hausfield 1/8" NPT Tank valve from HomeDepot (P/N: MP322900AV) x2 
  • 18gram N2 cartridge from Leland gas technologies
  • Leland gas Regulator
After the parts came in, I got to testing. The small hand pump took far too much effort and time to inflate the system to the needed pressure so that will not be the primary way to pressurize the system.

Next was to try the bike inflator with the N2 cartridges. Alas, the small cartridges leaked out way too quickly when pierced with the bike inflator for any substantial filling.

So that leaves the last option which was 18g N2 cartridges and the Leland Regulator.

Image from: http://a-zpjtkijf.lagrangesystems.net/media/catalog/product/cache/2/image/450x/9df78eab33525d08d6e5fb8d27136e95/4/5/450x450x450x450x41762-mini-nitrogen-refill.jpg.pagespeed.ic.XSUdgSSzV9.jpg

Regulator with KQ2H07-34S attached.


Since the amount of pressure in an 18g N2 cartridge is high, to the point where it can create Crescent Rose into a ticking time bomb, there needs to be a way to bleed out extra pressure if it gets too high. Since Crescent Rose takes 60psi to extend and retract once, the limit should be around that. In order to do that, a pressure relief valve is needed. I used a Norgren relief valve (PN:16-004-007)


Image from: http://cdn3.volusion.com/vyfsn.knvgw/v/vspfiles/photos/am-2002-2.jpg?1442240393


The pressure relief valve was adjusted for bleeding out air at 75 psi. In addition to the relief valve, there must be a way to bleed out air from the system manually. It can be done with a brass ball lever valve, a schrader valve, or a presta valve.

Image from: http://i.stack.imgur.com/5M9mo.jpg

Below is a lever valve.

http://img.hisupplier.com/var/userImages/2011-08/11/103139848_Lever_Ball_Valve_s.jpg
Image from: http://img.hisupplier.com/var/userImages/2011-08/11/103139848_Lever_Ball_Valve_s.jpg


I used a schrader valve. This one is Campbell Hausfield 1/8" NPT Tank valve from HomeDepot (P/N: MP322900AV).

Image from: http://www.homedepot.com/catalog/productImages/400/f4/f4b65762-50eb-4458-a7f8-1430c38bbd1b_400.jpg

 
So in order to attach these components to what is there already, a brass cross fitting is needed.

Image from: http://www.toolorbit.com/image/Interstate-Pneumatics/Interstate-Pneumatics-FP66X-lg.jpg


To attach tubing to it all, a push fitting is used (PN:KQ2H07-34S).

Image from: http://www.alliedelec.com/images/products/Small/70070334.jpg

All the fittings were wrapped with teflon tape and attached like so.


The Leland regulator was then attached to Crescent Rose via velcro, hotglue, and zipties. Tubing was then run from the above setup to the regulator.


Now to test the whole thing.


Works well.

Future possible improvements:
-Change material of the claw
-Replace the 3-wire Vex motor with a 2-wire Vex motor.
- Fix the leaks
-Find a better air source.

Quality of life changes here.

Tuesday, March 22, 2016

Crescent Rose Nerf Gun Addition

The other functionality of Crescent Rose besides transforming is shooting. So far, I haven't seen a fully transforming Crescent Rose that would also shoot projectiles. So I'm going to have Crescent Rose shoot Nerf bullets too.

Before I start building I must make sure that Crescent Rose has enough space. Took some measurements.


Compared to the Nerf 6 dart clip.

Image from: http://g04.a.alicdn.com/kf/HTB15JVKIpXXXXXyaXXXq6xXFXXXg/Original-Nerf-Elite-Darts-Ammunition-Bullet-Cartridge-Holder-Clip-Hold-6-Foam-Bullet-N-Strike-Pistol.jpg
8cm across is about 3 1/8" which fits into Crescent Rose. I've then started researching the many types of Nerf guns and the methods used to fire the darts. These include flywheels, direct plunger, reverse plunger and motorized plunger. Considering that most plunger guns with a clip system require space behind the clip (see the following guns),

Nerf Recon, image from http://cdn.instructables.com/FFE/7TV3/H1JUH1RT/FFE7TV3H1JUH1RT.MEDIUM.jpg

Nerf Retaliator, image from http://i.imgur.com/ALNkr.jpg

I won't be able to use plungers at all. Crescent Rose has no space for that as the nerf clip will be placed in front of the pseudo clip already on Crescent Rose used for storage of the pneumatic parts.

Circled is the pseudo clip. No room for plunger systems.

So the only thing I will be able to use are flywheels.

These are flywheels, image from http://aznerfwar.com/wp-content/uploads/2015/04/Flywheels.jpg

Flywheels are basically 2 DC motors that spin in opposite directions. Simply slide a nerf dart in and it shoots out. I will be able to mount these in front of the nerf clip and simply push the dart forward with a finger. I first set out to buy just the nerf clips, but darts and a 2 new clip cost $20, the same as a nerf gun. Well, if I get a gun I'll get the flywheels, darts, clip, and a nerf gun that I can paint for other costumes. So I got a nerf gun. The N-Strike Elite Stryfe.


After it came in, I got to taking it apart.


Even as toy, quite a bit of engineering went into this.


There's the part that holds the clip in the gun. Press the button and it slips out.


There's this thing. Which is a thermistor. Basically a electrical component that increases it's resistance as the heat applied goes up. It's a protection component for the DC motors.


There's these two switches. The trigger won't move unless both of theses are pressed. As in you can't fire the nerf gun unless you have a clip in the gun and are pressing the acceleration switch.


Well, I need the flywheels so...

Yoink

And cover it back up. Now to create a new clip holder. Made one with foam board and hot glue.


The screws with the Vex standoff holds the clip lightly when apart, tight when together.


The flywheels were then attached to the foam board clip holder.


Painting time!


Since Crescent Rose extends, the barrel has to extend too. This is achieved by having two barrels able to slide in and out of each other. Like a lightsaber. Here, I've decided to use PVC pipes.

Smaller one is 3/4 inch  inner diameter, bigger one is 1 inch outer diameter.

One can slide in the other.


Now to attach it to Crescent Rose. Hot glue was used to attach the piping and clip holder.


Test firing shown below.


Works!

Pneumatic system fixes here.

Saturday, March 12, 2016

RGB LED tutorial


This tutorial assumes that you know the basic principles behind normal LEDs.

What are RGB LEDs?

RGB LEDs are three LEDs combined into one. See below.

Image from: https://cdn.solarbotics.com/products/photos/84728eb26b0947ef6547884cea645502/LED-RGB-8CD5kCA-IMG_0965.jpg
Instead of 2 wires coming out, you now have 4 wires coming out. The longest one can represent ground or voltage, and the 3 others correspond to red, green, and blue. They also come in 2 variations: Common Anode and Common Cathode.

Image from: http://eeenthusiast.com/wp-content/uploads/2015/03/rgb.jpg


Whats the difference between Common Anode and Common Cathode? 

Common Anode will only work if you put a voltage(red wire) through the longest wire first and a Common Cathode will only work if you put a voltage(red wire) through the color wire(s) first. See the example below.

Image from: http://bildr.org/blog/wp-content/uploads/2011/01/RGBLEDs2.png
(Please don't use the above resistor values. Your LEDs most likely has different specifications)

So complicated! Why would I ever use them?

1) Space

With RGB LEDs, you conserve physical space compared to ordinary ones because RGB LEDs are after all 3 LEDs in one. Great for applications(props) that need different colors in a small space.

2) Color mixing and customization

Sure you can get all the colors in normal LEDs but you won't be able to get the full range of color. As in you can buy a pink LED and purple LED but you won't be able to buy an LED that is between those values if you want a pinkish-purple or purplish-pink color. In addition, true cyan LEDs are notoriously hard to get, companies like to label greenish-blue LED's as cyan. The only color RGB LEDs can't get is ultraviolet, but the control available to get all the other colors more than makes up for it.

So how do you use them?

You use them like any other LED. For the sake of simplicity, we will use a Common Anode RGB LED. Connect your power source to the longest lead on the LED, connect your resistor to the other LED lead you want to light up, and connect the other end of the resistor to the color that you want.

For example, if you want to get red light out of an RGB LED, you would connect it like this. assuming that your RGB LED is Common Anode.


Okay, but what about say yellow? You then have to connect the red line and the green line.


Other pins can be connected in a similar fashion. Here is a table for all of the possible combinations and colors.


Red
Green
Blue
Red
On
Off
Off
Green
Off
On
Off
Blue
Off
Off
On
Yellow
On
On
Off
Purple
On
Off
On
Cyan
Off
On
On
White
On
On
On


So if you want to get purple, you have to power the red and blue lines to get purple.
See that the colors match the RGB color wheel.

Image from: http://www.juude.info/color/colorImages/rgb.png


Which resistor do I use?

Calculating the resistor is no different than calculating resistors for normal LEDs. For just red, just green, and just blue, you calculate it like so. Vss is the supply voltage that you choose(your battery). Vf is the forward voltage of your LED (find the number in your LED specification sheet), If is the forward current of your LED(find the number in your LED specification sheet).

For Red, you use the Red Vf and If values from spreadsheet to calculate the resistor.


R=(Vss-(Vf))/If, where Vf and If correspond to red or blue or green Vf and If values.

For yellow,purple, cyan, and white you calculate the resistors as if you have parallel LEDs with an individual resistor for each LED.

For Yellow, you use the Red If and Vf values for the Red line and the Green If and Vf values for the Green line. You will run the formula two times. One with Red, one with Green.

R=(Vss-Vf)/If, where you run this formula for each branch present. Each branch has it's own Vf and If (corresponding to red or blue or green Vf and If values)so read the specification sheet carefully.

These calculations are for a single RGB LED. The resistor value will be different for multiple LEDs.

How do I mix the colors more

You have to change the resistor values. Say to get a greener yellow, you can either reduce the green line resistor value or increase the red line resistor value. If you do this, don't exceed the RGB LED's recommended specs for each red,green, and blue line. For things like this, I would highly recommend getting a potentiometer. It is a device that you twist with a screwdriver or flathead to get different resistances. See this wikipedia article.

I want to switch between colors.

This requires a 7 position switch(minimum) and rectifier diodes. See Myrtenaster build writeup 3 for an example. The circuit there uses a current regulator. To do it with resistors, place a resistor on each color branch of the RGB LED.

I want to cycle through all the colors automatically.

They sell cycling RGB LEDs. You connect all the leads and calculate the resistors like in the white case.

I want to *insert special effect here that isn't cycling*

Most likely requires a microcontroller and coding which is not covered in this tutorial. There are tons of other tutorials for this online.


And there you have it. A simple overview on RGB LEDs. Feedback is highly appreciated.